My other posts
Azure B2C custom policy with Entra ID support
Table of contents
Introduction
When it comes to authentication and authorization systems, there are not a great deal of managed services with overall excellent quality (security-, performance-, and cost-wise).
While Auth0 is an extremely common provider, the cost is prohibitive for small companies, especially when you want to have a single system that supports external and employee accounts. For that, Auth0 requires you to use the parent company's Okta, which makes the costs much higher.
Azure has a product that allows you to achieve this with very low cost to entry (up to 50.000 Monthly Active Users for free), Azure Active Directory B2C.
As Microsoft puts it in the docs, Azure B2C allows you to configure a number of providers (as well as generic OAuth 2, OpenID Connect, and SAML2 providers):
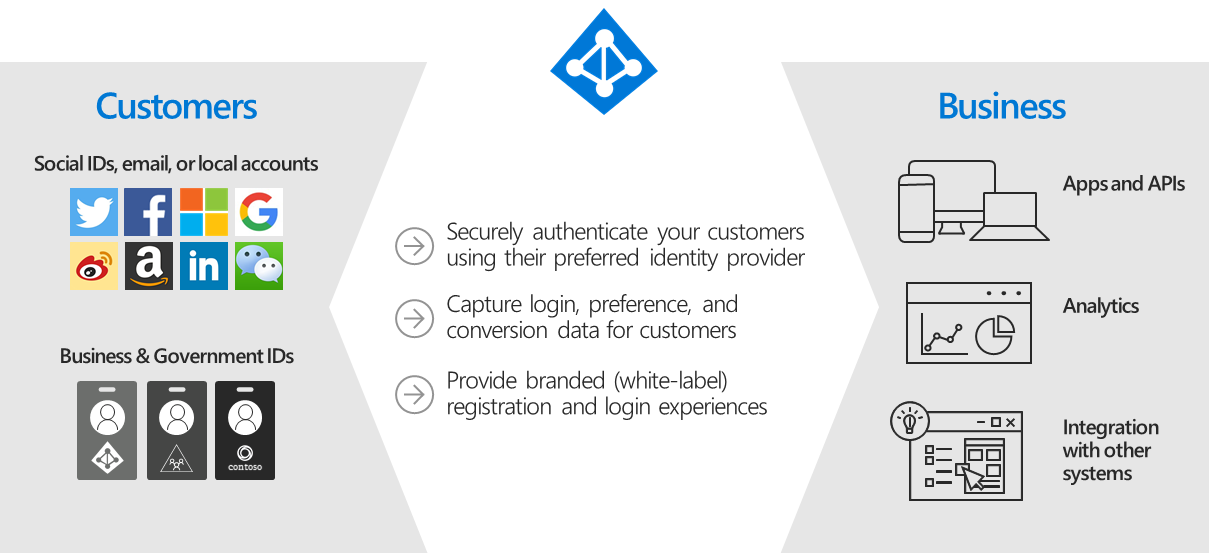
Azure B2C Overview. Microsoft Learn.
One of the main problems that Azure B2C has is that it has 2 main ways of using it:
- User flows: you configure everything through the Azure Portal. It is quite limited in configuration options when compared to custom policies. It also doesn't support (as of the time of writing this) Entra ID sign in.
- Custom policies: you configure everything through a set of XML policies. It is incredibly customizable, but the development is quite painful and time-consuming.
This post will try to accomplish two objectives. On one hand, show you how to set up Entra ID sign in, and on the other hand provide tips for creating custom policies, to improve the development experience.
As an added extra, the policy provided as a sample splits the sign up flow into two steps: email verification and rest of the sign up properties.
Prerequisites
Firstly, I will not go into the details, and expect you to at least be familiar with:
- Azure/Entra ID/Azure B2C
- XML
- Security in general
I highly recommend you to spend the time to read through the entire Custom Policy Schema reference articles on Microsoft Learn if you are planning to adopt Azure B2C at a company level. The time spent on going through this will be nothing compared to the time saved because you don't know what you are doing.
Secondly, unless you have done so already, you need to:
- Follow the Microsoft Learn articles to set up the base Azure B2C environment.
- Follow the Microsoft Learn articles to set up the Entra ID environment.
Variables
Please note that I will refer to the following variables throughout the post (and the sample pack on GitHub) to make it easier to figure out what values you are looking for.
{YOUR_TENANT}: the name of your B2C tenant without the .onmicrosoft.com suffix.{YOUR_APPLICATION_INSIGHTS_KEY}: Application Insights key - optional but highly recommended to use Application Insights during development. This entry is in the SignUpOrSignin policy and can be deleted if you want.{YOUR_IEF_PROXY_CLIENT_ID}: the ID of the App Registration on the B2C tenant for the proxy login.{YOUR_IEF_CLIENT_ID}: the ID of the App Registration on the B2C tenant for the login.{YOUR_AAD_TENANT_ID}: the ID (GUID) of your base AAD tenant.{YOUR_AAD_CLIENT_ID}: the ID of the App Registration on the base AAD tenant.
Pro tip: the IEF variables are from the first Microsoft Learn article, while the AAD variables are from the second article.
Also note, wherever AAD is mentioned in this post, it refers to Entra ID (formerly Azure Active Directory).
Policy pack
I've created a full policy pack, based on the Social and Local accounts template, and made it available on my GitHub repository.
Pro Tips
Azure B2C caches policies
Something you should always keep in mind is that Azure B2C caches policies, anywhere from 0 to 15 minutes. It has been requested for this to be modifiable in development, but Microsoft hasn't come back yet with a plan for including this.
It has been said that you can create a new policy file, copy over everything you need (most likely the Relying Party file and the entirety of the TrustFrameworkExtensions file), and give it a unique name. This should let you see the changes immediately, but you would have to remember to change the name of the policy always and copy the URL to test the application as well. I have personally not tried this yet, though.
Document what you add
I got used to adding simple XML comments to things I add, it makes it much simpler to figure out why something is there later on. For example:
<ClaimsTransformations>
    <!-- For Local Sign Up. This ClaimsTransformation takes the user's email and converts it into readonly -->
    <ClaimsTransformation Id="CreateReadonlyEmailClaim" TransformationMethod="FormatStringClaim">
    <InputClaims>
        <InputClaim ClaimTypeReferenceId="email" TransformationClaimType="inputClaim" />
    </InputClaims>
    <InputParameters>
        <InputParameter Id="stringFormat" DataType="string" Value="{0}" />
    </InputParameters>
    <OutputClaims>
        <OutputClaim ClaimTypeReferenceId="readonlyEmail" TransformationClaimType="outputClaim" />
    </OutputClaims>
    </ClaimsTransformation>
</ClaimsTransformations>
Another example:
<ClaimsProviderSelections>
    <!-- Allow the user to see the sign in with email option -->
    <ClaimsProviderSelection ValidationClaimsExchangeId="LocalAccount_SignIn" />
    <!-- Allow the user to reset their password -->
    <ClaimsProviderSelection TargetClaimsExchangeId="ForgotPasswordExchange" />
    <!-- Allow the user to see the sign in with AAD option -->
    <ClaimsProviderSelection TargetClaimsExchangeId="AADExchange" />
</ClaimsProviderSelections>
Use SubJourneys to simplify logic
It is a bit painful to write Orchestration Steps when you have several flows together. You are forced to remember every precondition so that you don't execute steps that don't correspond to the current flow. This very quickly grows out of control, so I prefer to use subjourneys that clearly identify the flow. For example:
<SubJourney Id="LocalSignUp" Type="Transfer">
    <OrchestrationSteps>
    <!-- 1. Once email is verified, we continue with the sign up flow. -->
    <OrchestrationStep Order="1" Type="ClaimsExchange">
        <ClaimsExchanges>
            <!-- Invoke the second part of the sign up flow -->
            <ClaimsExchange Id="LocalAccountSignUp_WithReadOnlyEmail" TechnicalProfileReferenceId="LocalAccount_SignUpAfterEmailVerification" />
        </ClaimsExchanges>
    </OrchestrationStep>

    <!-- 2. Get the user's data using the Object ID -->
    <OrchestrationStep Order="2" Type="ClaimsExchange">
        <ClaimsExchanges>
            <ClaimsExchange Id="AADUserReadWithObjectId" TechnicalProfileReferenceId="AAD-UserReadUsingObjectId" />
        </ClaimsExchanges>
    </OrchestrationStep>

    <!-- 3. Return the resulting claims to the application -->
    <OrchestrationStep Order="3" Type="SendClaims" CpimIssuerTechnicalProfileReferenceId="JwtIssuer" />
    </OrchestrationSteps>
</SubJourney>
You do end up with some bits of code duplicated per subjourney, but at least you don't have to remember to add this to a dozen steps:
<!-- Skip if we don't have an authenticationSource value -->
<Precondition Type="ClaimsExist" ExecuteActionsIf="false">
    <Value>authenticationSource</Value>
    <Action>SkipThisOrchestrationStep</Action>
</Precondition>
Use Application Insights for troubleshooting
When you get generic errors, it's almost impossible to figure out without looking at the server-side logs. For this, Application Insights is what Azure B2C suggests, and adding the support is simple - in fact, the policy pack I published in GitHub has Application Insights pre-configured.
Remember though to change the mode from Development to Production when you are done with testing.
Microsoft Learn shows how to troubleshoot a number of common problems as well.
Consider validating email before local account sign up
The default template for local account sign up has a bit weird experience when it comes to duplicate email addresses. The user has to fill everything in just to be told that the email is already in use. Instead, I propose separating the email verification step from the rest of the sign up flow, and if the email is already in use, prevent the user from moving on. This is part of the policy pack that I hosted on GitHub, but is simply this (besides related Building Blocks definitions):
<!-- This TechnicalProfile makes the user enter and verify their email. -->
<TechnicalProfile Id="LocalAccount_EmailVerification">
    <DisplayName>Email verification for Local Account</DisplayName>
    <Protocol Name="Proprietary" Handler="Web.TPEngine.Providers.SelfAssertedAttributeProvider, Web.TPEngine, Version=1.0.0.0, Culture=neutral, PublicKeyToken=null" />
    <Metadata>
        <Item Key="ContentDefinitionReferenceId">api.selfasserted</Item>
        <Item Key="language.button_continue">Continue</Item>
        <Item Key="UserMessageIfClaimsTransformationStringsAreNotEqual">The account you are trying to create already exists, please sign-in instead.</Item>
    </Metadata>
    <DisplayClaims>
        <DisplayClaim DisplayControlReferenceId="emailVerificationControl" />
    </DisplayClaims>
    <OutputClaims>
        <OutputClaim ClaimTypeReferenceId="email" PartnerClaimType="Verified.Email" Required="true" />
        <OutputClaim ClaimTypeReferenceId="authenticationSource" DefaultValue="localAccountAuthentication" />
    </OutputClaims>
    <ValidationTechnicalProfiles>
        <ValidationTechnicalProfile ReferenceId="AAD-VerifyEmailDoesNotExist" />
    </ValidationTechnicalProfiles>
</TechnicalProfile>

<!-- This is a Validation TechnicalProfile which validate that the verified email (from the user's input) doesn't already exist in B2C. -->
<TechnicalProfile Id="AAD-VerifyEmailDoesNotExist">
    <Metadata>
        <Item Key="Operation">Read</Item>
        <Item Key="RaiseErrorIfClaimsPrincipalDoesNotExist">false</Item>
    </Metadata>
    <IncludeInSso>false</IncludeInSso>
    <InputClaims>
        <InputClaim ClaimTypeReferenceId="email" PartnerClaimType="signInNames.emailAddress" Required="true" />
    </InputClaims>
    <OutputClaims>
        <OutputClaim ClaimTypeReferenceId="objectId" DefaultValue="NOTFOUND" />
        <OutputClaim ClaimTypeReferenceId="objectIdNotFound" DefaultValue="NOTFOUND" AlwaysUseDefaultValue="true" />
        <OutputClaim ClaimTypeReferenceId="readOnlyEmail" />
        <OutputClaim ClaimTypeReferenceId="authenticationSource" DefaultValue="localAccountAuthentication" />
    </OutputClaims>
    <OutputClaimsTransformations>
        <OutputClaimsTransformation ReferenceId="AssertObjectIdObjectIdNotFoundAreEqual" />
    </OutputClaimsTransformations>
    <IncludeTechnicalProfile ReferenceId="AAD-Common" />
</TechnicalProfile>
Closing
I hope these tips help you with the development of your Azure B2C policies, and I will update this if/when I come up with more tips. Feel free to reach out in the comments section for any help or tips!